
Note to Linux beta testers if you got a beta unit prior to November 2014 your unit does not contain a signed firmware image - the software currently released on this page now checks the OneRNG's firmware integrity before starting rngd - if your unit is working well there's no real reason to update the software, if you're having occasional reliability issues starting the unit then probably you should grab this new version of the support software, you can disable the firmware check by editing the configuration file /etc/onerng.conf
Simply:
Paranoia abounds! well maybe a bit - we are in a situation where we don't trust our tools - especially our crypto tools - this project is an attempt to create a cheap open source entropy generator that's open enough that one can verify and trust it.
We've based our design on an existing platform - our Cheap RF system - mostly because it's cheap to build, we had existing hardware, and had just finished bringing up a USB stack for it
Our simple device is a USB stick, it is open source hardware, you can build your own, runs open source firmware - and you can physically open it to make sure that what's inside is what you expect. With an external programmer you can also program it with your own firmware.
We generate ~350kbits per second of entropy packaged at ~7.8 bits/byte - if you use the entropy data at a lower it accumulates and we quickly approach 8 bits/byte.
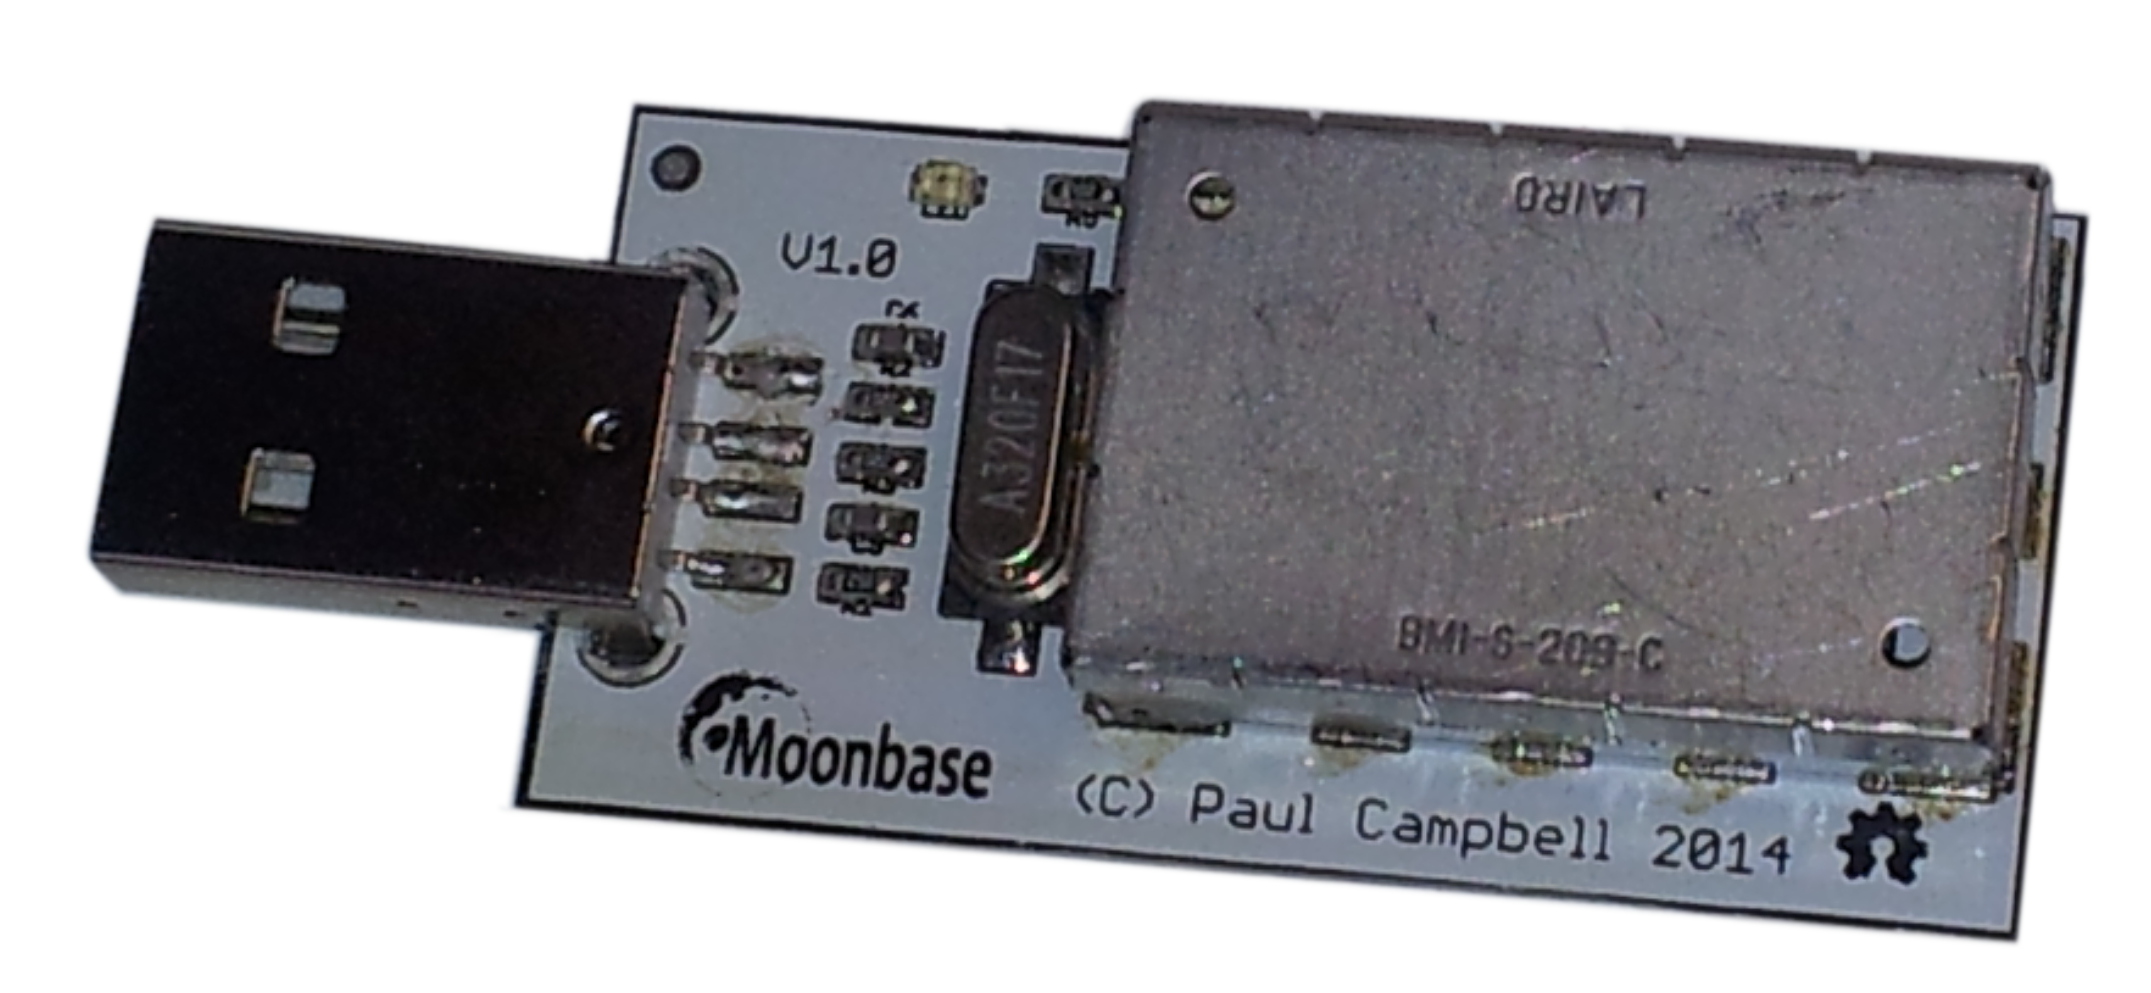
First of all - have a look at the board, remove the 'tin foil hat' (a shield to keep the RF noise in and the external interference out) by gently levering up the corners one by one, and make sure that the component layout looks like this:
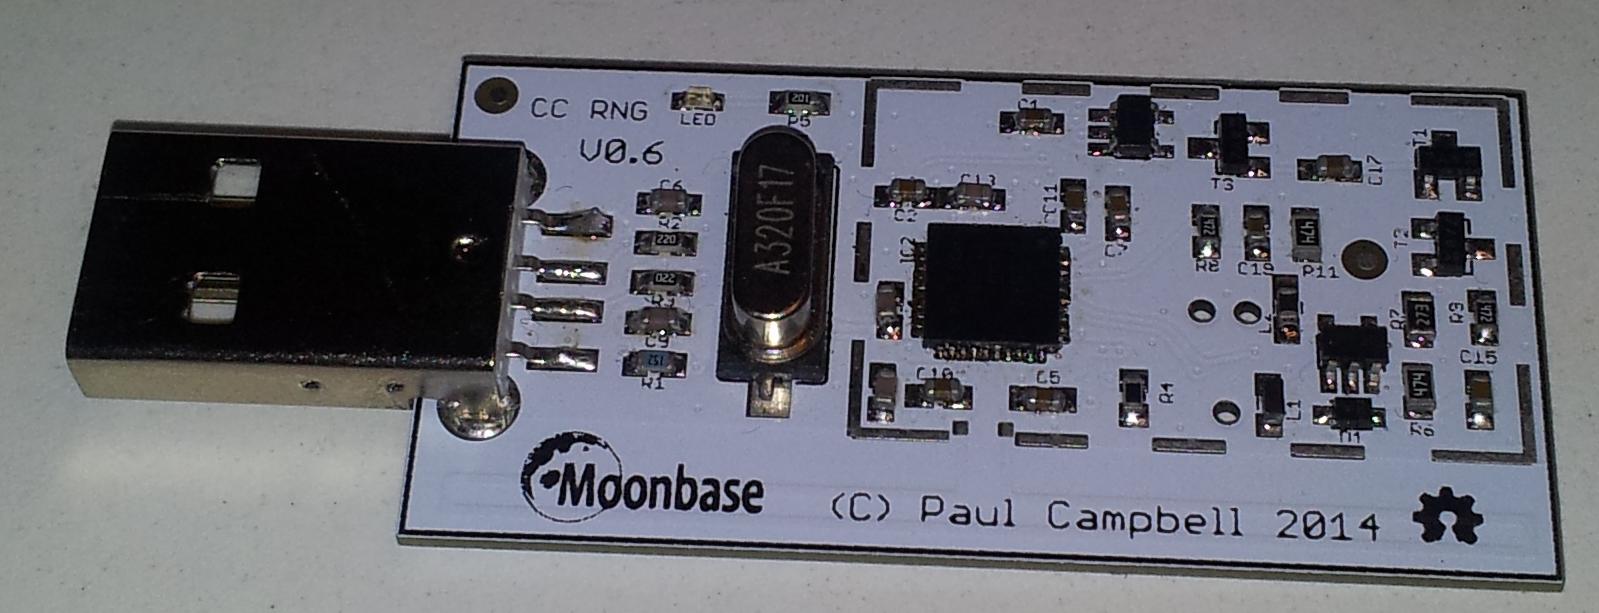
In particular check that you have a CC2531 and that it is a 256k part - "F256"

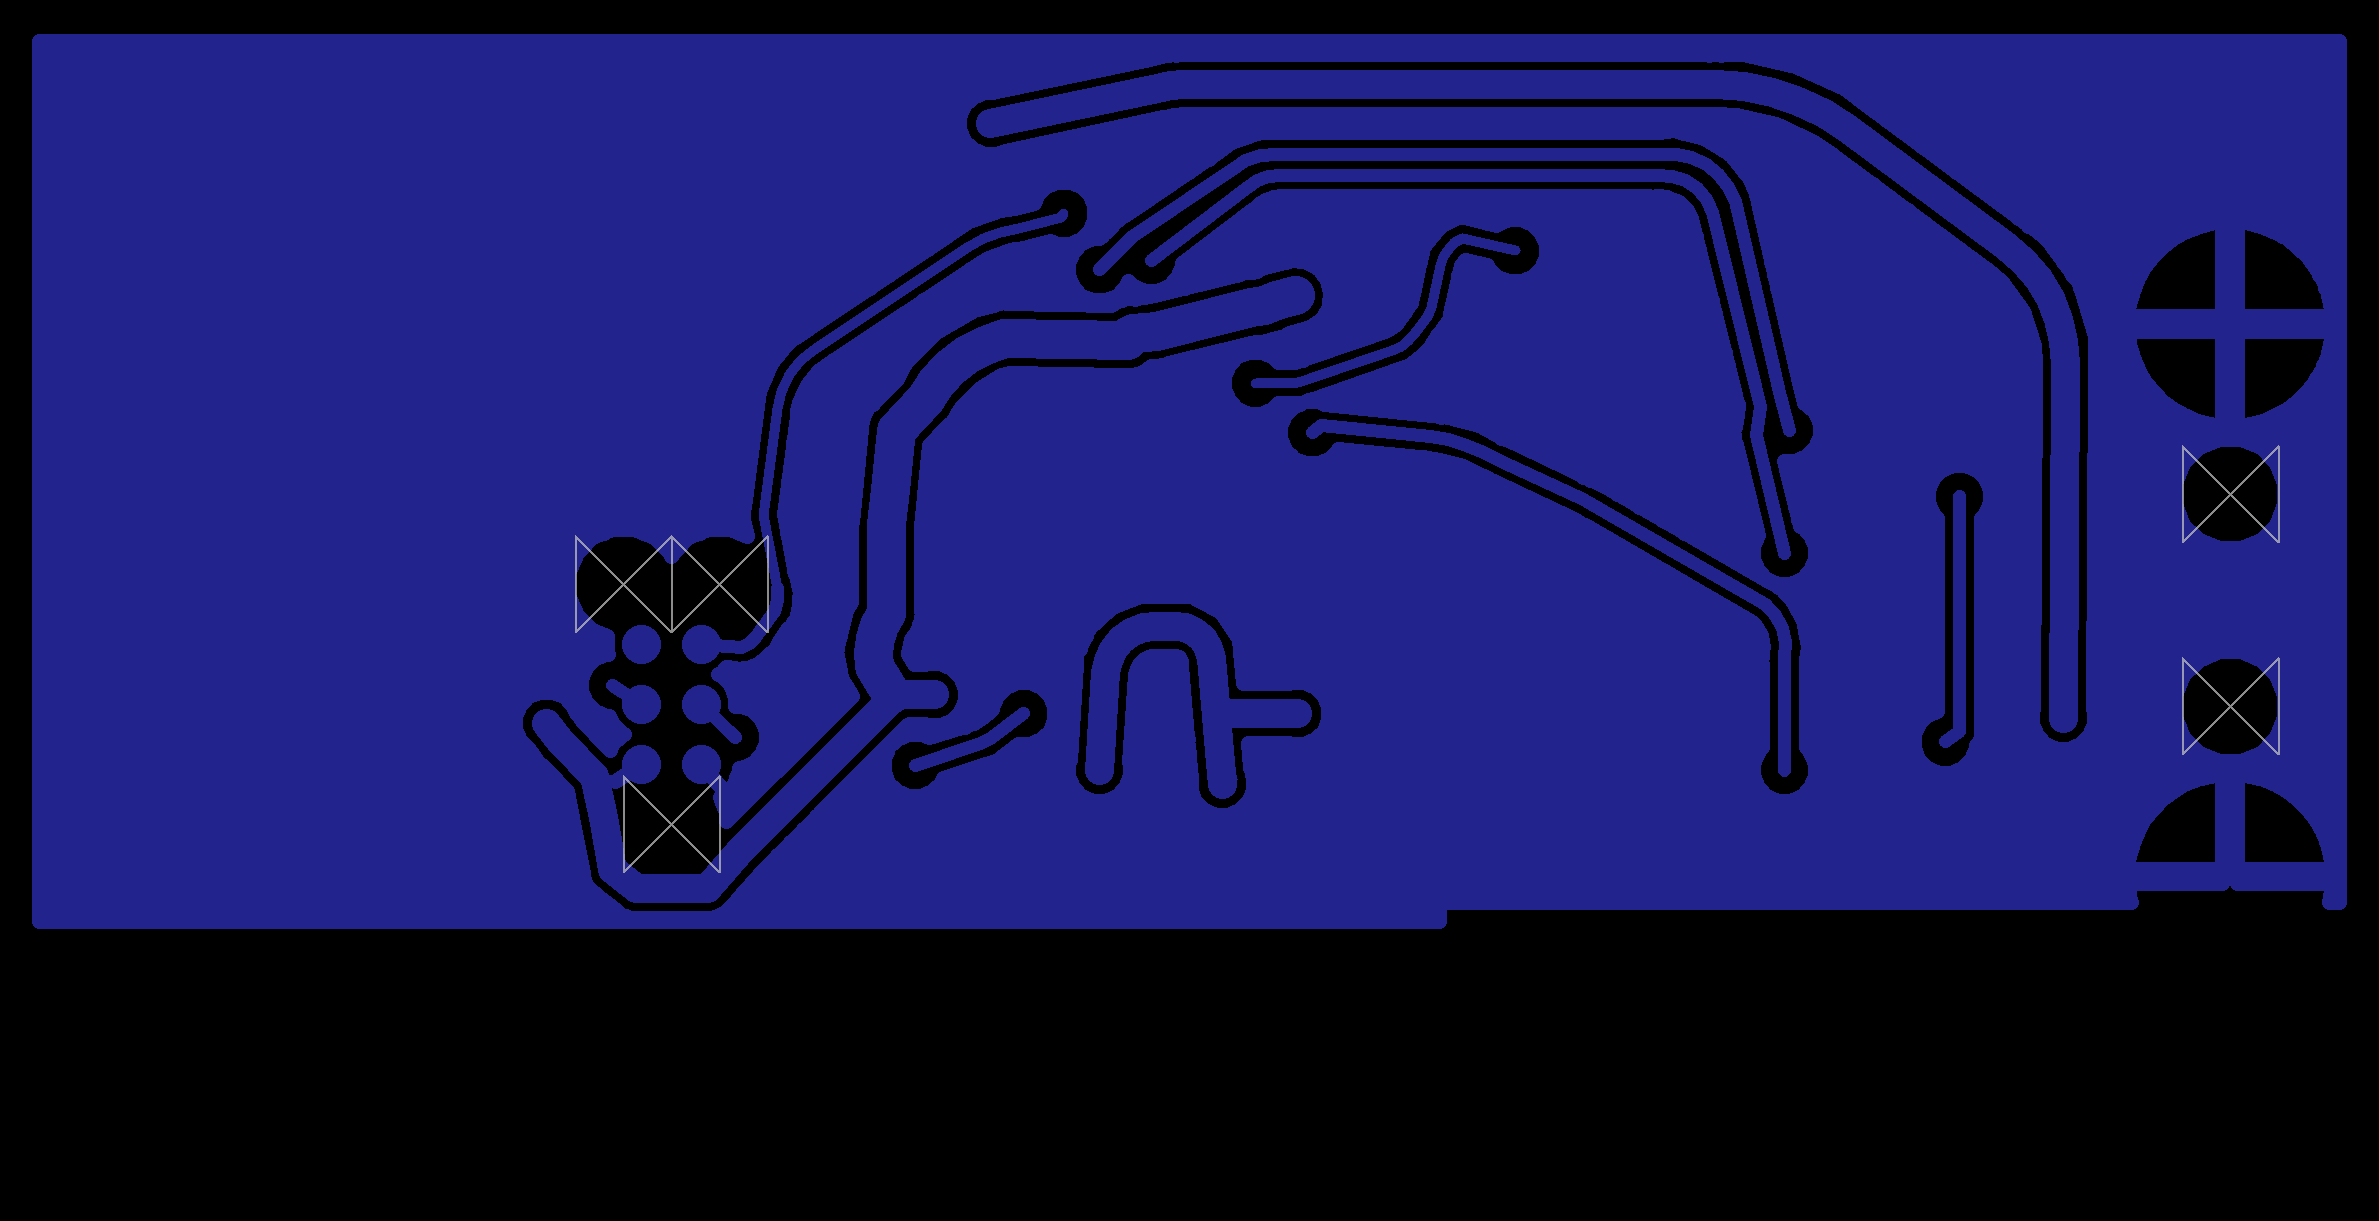
Hold the OneRNG in a bright light and tilt it look at the reflections from traces on the two layer circuit board, they should look like this on the top:
and like this on the bottom:
We have a number of different versions in the field now - check out the images here to make sure yours matches one of them.
Stick it in any USB slot - the light should come on almost immediately - the light indicates that entropy is available in the device's internal entropy pool - it will dim when entropy is being extracted. If you are using the RF noise source you may see it flicker periodically as the receiver shifts to a random channel. If it blinks in one or two 1 second blinks it indicates that the avalanche diode noise source is broken and the firmware has detected it is stuck at 0 or 1 - in this case data will not be entered into the entropy pool and the device will stop delivering data to the system. If it fails like this and is still under warrantee please return it for a replacement.
Remove the OneRNG from your system.
Start by installing rngd - use the command:
sudo apt-get install rng-tools at python-gnupg openssl
Some users may need to start the "atd" service.
Download the Debian package onerng_3.6-1_all.deb (md5: 682e6cb648a58a0443b51ff773197a50
sha256: a9ccf7b04ee317dbfc91518542301e2d60ebe205d38e80563f29aac7cd845ccb).
Install it with:
sudo dpkg -i onerng_3.6-1_all.deb
Finish by plugging the OneRNG back into a USB slot.
You can remove the software with:
sudo dpkg -r onerng
Remove the OneRNG from your system.
Start by installing rngd - use the command:
sudo yum install rng-tools at python-gnupg openssl
Some users may need to start the "atd" service.
Download the rpm package onerng-3.6-1.fc20.noarch.rpm (md5: 6cfbbebe1998bc0e7733cc9f752a0548
sha256: 2ebebadea4f77a59ae2793ed457a19afdd5d68a92f13f748f8d2dceeb10d9c11).
Install it with:
sudo rpm -i onerng-3.6-1.fc20.noarch.rpm
Finish by plugging the OneRNG back into a USB slot.
You can remove the software with:
sudo rpm -e onerng
Remove the OneRNG from your system.
Down load and install the following packages and their dependencies, if they are not already present - openssl, rngd, at and python-gnupg. Some users (Arch linux in particular) may need to start the "atd" service.
Download the source package onerng_3.6.orig.tar.gz (md5: f1ffd033c56c9d66425304cef7d50f68
sha256: 66a6d4be9725642488c33effa04b389bf24e4dd66b45f7316f3403142c1d80a3) into a temporary directory.
Install it with:
	tar xzf onerng_3.6.orig.tar.gz
	cd onerng_3.6
	sudo make install
	sudo udevadmin control --reload-rules
Finish by plugging the OneRNG back into a USB slot.
You can remove the software with:
sudo rm /usr/lib/udev/rules.d/79-onerng.rules /sbin/onerng.sh
To verify that your device is working plug in your device, you should see the LED come on, then dim for a short while then brighten again. You can test the installation simply - enter the command:
cat /dev/random >/dev/null
If the system is running correctly the LED on the device will dim until you type ^C.
You can change the mode that the device runs in by editing the file /etc/onerng.conf - instructions are in the file header - there is more information on the theory page that explains what the various modes mean.
This section describes in detail how to talk to the device, if you want some distro specific installation look above. The instructions above show you how to set up your system to operate automatically - if you want to manually interact with the device read onwards.
No special driver is required to use the device under Linux, the device emulates a serial/modem device when you first plug the device into your machine you can use the 'dmesg' command to see what device name it receives, you'll see something like:
cdc_acm 2-1.2:1.0: ttyACM1: USB ACM device
In this case the device is named /dev/ttyACM1 - you should prepare it for operation with something like:
	chown root /dev/ttyACM1		# make sure no one can interfere with it
	chgrp root /dev/ttyACM1
	chmod 600 /dev/ttyACM1
	stty raw -echo </dev/ttyACM1	# put the tty device into raw mode (no echo, treat special
					# like any other characters)
	echo	cmd0 >/dev/ttyACM1	# put the device into the avalanche/whitening mode
	echo	cmdO >/dev/ttyACM1	# turn on the feed to the USB
You can now extract entropy from the device using something like cat or dd to copy data from /dev/ttyACM1, or we recommend you use a purpose built application like rngd:
sudo rngd -r /dev/ttyACM1 -p /var/lock/LCK..ttyACM1
To test that everything is plumbed correctly type "cat /dev/random >/dev/null" you should see the light on the device dim as entropy is removed from its pool
Because we use a generic USB modem interface to talk to our device if you have the modem-manager package installed it may try and access your device and talk to it, trying to decide if it might be something like a cell phone - while this wont harm it it may mean that you don't have access to it for a while after you first plug it in. We've already worked with the modem-manager authors to make sure that our device is on their black-list so that they will ignore it, however your distro may not be up to date - if it isn't already there you can fix this by editing the file /etc/udev/rules.d/77-mm-usb-device-blacklist.rules and adding the following line:
ATTRS{idVendor}=="1d50", ENV{ID_MM_DEVICE_IGNORE}="1"
Of course no one wants to type all the above in each time your system boots, follow one of the sets of instructions above to install a udev script that handles all this and starts rngd when a device is plugged in.
It's very important that when you set up the unix device file that you disable echo before you use it, if you don't eventually the device will eventually generate a valid command string that will be echoed to the device and result in it reprogramming itself - you'll also reduce the performance of the device reading all that extra data and discarding it.
Windows installation is still a work in progress ....
Download the file: onerng.inf and place it on disk somewhere.
Plug the device in to any USB slot as described above. Windows will likely complain that no driver is available, this is not a problem since the board uses standard Windows USB CDC drivers and just needs to be told to do so with the .inf file you just downloaded. Details of how to install the drivers will depend on which version you are running (we'll try and add as many here as possible), usually though you need to hit the device troubleshooter for the device, when it searches for a driver tell it you have one and navigate to the location where you saved the onerng.inf file.
We will need some app to copy entropy data, that's TBD at the moment.
.OneRNG works with the internal Mac drivers, we don't yet have a program to copy entropy data to the kernel.
TBD
The device is largely encased in a metal shield - this is both to protect the circuit from external interference and to keep the noise contained - the lid can be removed to verify that it contains the circuit that you expect - check out a photo here to see what you should see.
Underneath the board you will find 3 holes and 6 small silver pads - this is the programming interface - if you're never planning on programming it yourself and are worried about security you can put a drop of epoxy or super-glue over the connections, at the same time if you like you can glue down the lid
By design there is no way to program the device over the USB bus, you must use the programming interface to change its firmware. You can however verify that the firmware image is correct.
We do NOT encrypt the data passing over the USB bus - the CPU used on the board contains an AES-128 unit - but feel that if we can't trust RNGs in existing silicon we probably have the same issues trusting it as we do trusting any other complex silicon - having said that we happily use in in other products - encryption over the USB is left as an exercise to the reader.
There is a command documented in the Theory of Operation page that will dump the ROM images over the USB bus - there are two versions of the CC2531 CPU we use - 128k and 256k - you'll get the image that matches the chip on your board.
The actual firmware is quite small - 6k in a 256k image - it would be easy to put some other bogus firmware image in there that when asked returns our 'good' image. To guard against that we pad out the image with random data to the size of memory less 512 bytes - then append a PGP signature - we verify the extracted firmware image every time we boot by checking it is signed correctly.
The system continually tests the data coming out of the random number circuitry .... if we see that the circuitry has shut down we blink the LED one second on, one second off. Be carefull not to confuse this with normal system operations - for example a system process that uses random data every second - you can test this by consuming ALL the system entropy "cat /dev/random </dev/null", if you are doing this and the LED is still blinking the OneRNG is broken.
NOTE: we have found a bug in the firmware that handles the LED in this case - the system looks for long runs of 1s or 0s (8 bytes), in a true random number generator this occasionally triggers by itself, which is normal, there is a bug in the code that resets the LED after we reset the error - the LED will go out and stay out. Because the LED is reset when drawing entropy from the device you will only see this bug happen when the device is plugged into a computer but no drivers are connected to draw data from it. Under normal operation you should not see this bug happen.
There is separate page that describes how the device works, how to control it and how it performs
The results of testing the output of the device are available on the Theory of Operation page
We have a Programming page - if you want to hack your own firmware we have pointers to the compiler suite
Check out the various Github repositories for their various licenses - as a rule software is LGPLed while hardware is GPLed.
No one does this alone, the great thing about open source is that we all get to stand on the shoulders of giants